Jewellery Tutorial - how to make earrings
Earrings are quick, easy and satisfying to make.
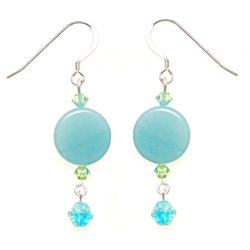
These instructions are for a simple pair of drop earrings, a variation on this design is given at the bottom of the page.
Earrings Ingredients
- A pair of earring fittings ( I've used fishhook)
- 2 head pins (These need to be at least 1cm longer than the length of your finished earrings)
- Beads of your choice
- Round nose and chain nose pliers
- Wire cutters

Earring Instructions
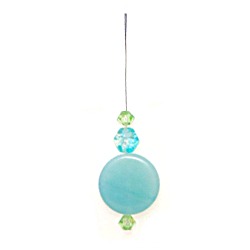
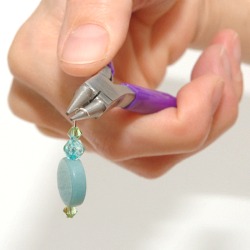
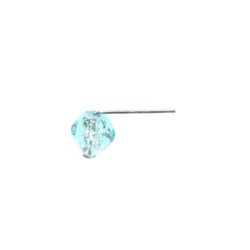
Picture 1 - thread your beads on a headpin
For the first earring, thread your beads on a headpin in a design that pleases you (see picture 1).
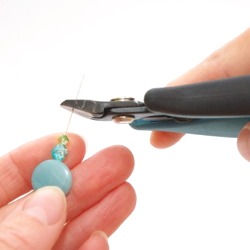
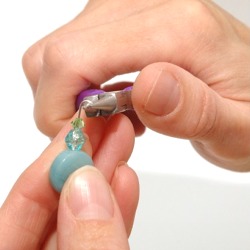
Picture 2 - snip off the excess wire
Using wire cutters cut off the excess wire to leave approximately 1 cm of wire above the top bead (see picture 2).
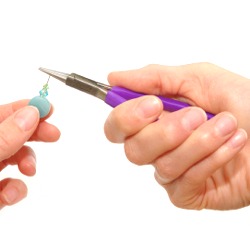
Picture 3 - get ready to make a loop
The next stage is to make a loop at the top of your beads to allow you to attach the earring fitting.
Hold your pliers in the hand position shown with the palm of your hand facing your body (see picture 3).
Place the tip of the head pin between the jaws of your round nose pliers.
Picture 4 - the correct position for your headpin in the pliers
Where you place the head pin between the jaws fo the pliers determines the size of the finished loop. If you place it at the top of the jaws, near the handle, you will end up with a much bigger loop than if you place it near the tip. In this case I have placed it about a third of the way up the pliers.
Make sure the top of the headpin doesn't stick out above the pliers, but is level with it (see picture 4).
Picture 5 - start to form the loop
Turn your hand towards you so that the back of your hand now faces your body (see picture 5).
Picture 6 - position your pliers to finish the loop
Keeping your headpin in the same position on the pliers turn your hand back again, without gripping the head pin, so that the pliers slide inside the half formed loop (see picture 6).
This puts your pliers in the right position to finish making the loop.
Picture 7 - finish the loop
Turn your hand back towards your body, this time gripping the wire between the pliers, to finish the loop (see picture 7).
Picture 8 - straighten the loop
You might find your loop is a little off centre. If this is so place the tip of your round nose pliers back into the loop and bend it back slightly to straighten it. (see picture 8).
Picture 9 - an alternative way to start a loop
If you find straightening the loop, after making it awkward, you can bend the headpin before starting the loop as in picture 9.
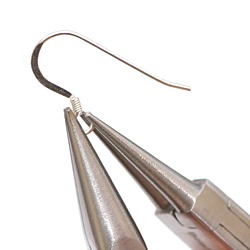
Picture 10 - prepare to open the earring fitting
The next stage is to open the loop in the earring fitting.
It is very important to open the loop side ways so that it doesn't lose its shape.
To do this you need to use two pairs of pliers placed either side of the loop (see picture 10)
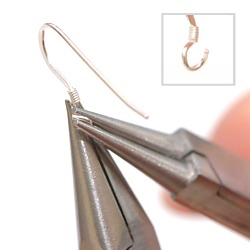
Picture 11 - open the earring fitting
To open the loop move the pliers on the right hand side towards you (see picture 11).
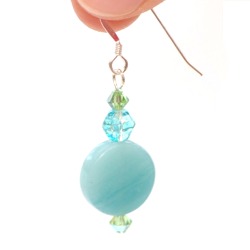
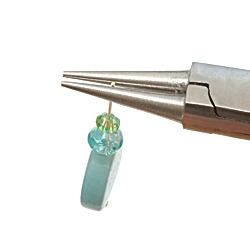
Picture 12 - attach your beads
Slip the loop on the top of your headpin into the earring fitting and close the loop by reversing the movement in picture 11.
That's it you've finished the first earring. All you have to do now is to make another one the same and you will have your own pair of unique, designer earrings.
A Variation
Picture 13 - a variation
To give more movement to your earrings, you can put some beads on a headpin and the rest on a piece wire. Make a loop at the top of the head pin and at each end of the piece of wire.
Open the loop on the head pin, sideways as in picture 11 above, and link it to one of the loops on the end of the wire. Link the other end to your earring fittings and enjoy.