Jewellery Tutorial - how to make a wrapped loop
Like the simple loop, a wrapped loop is one of the basic building blocks of jewelley making.
It is a very secure way of attaching a bead to another component, for example an earring wire.
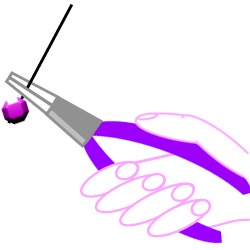
Hold the round nose pliers in the palm of your hand with your palm facing towards you.
Place the wire between the pliers with a small gap between the top of the bead and the pliers. Leave about 3cm of wire extending out of the top of the pliers.

With your thumb, bend the wire over the back of the pliers and under the pliers towards the front so that it sits between the top of the bead and the bottom of the pliers.
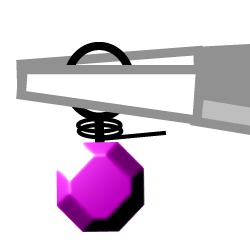
Take your pliers out of the loop. Put the loop flat between the jaws of the pliers so that it is held firmly.
Wrap the wire 2 or 3 times between the bead and the pliers and trim close to the bead.